Chicken thighs are bae. Period. They are hands-down my favorite part of the bird. I love wings and boobies and legs too, but thighs are just…pure love! I do not recommend this particular recipe for white meat because white meat isn’t as naturally fatty and full of moisture like dark meat. A chicken breast cooked using this method will dry out and ruin the dish — you would have to do some serious tweaking. With that said, this recipe is for THIGHS. Okay? Got it? Good.
As I’ve stated in other posts, the secret to a good sear is to have a super hot pan, and the protein you’re using shouldn’t be too moist. Blot it with paper towels, add it to the hot pan, leave it alone and you’ll be as golden as your chicken crust. This recipe is delicious without the parmesan cheese crust added to the skin, but once you go there…you won’t wanna go back. It’s truly a lovely, nutty, salty bite that just makes this dish stand out. The white wine sauce packs an umami punch from the portobellos and uses very little cream — you don’t need much at all, just enough to give it some body. Season the sauce up, let the mushrooms absorb those wonderful flavors, pour it over your finished chicken and baby?? Let me tell you…phenomenal and super easy!
Make this dish soon.

WASH YOUR CHICKEN THIGHS UNDER COLD WATER, THOROUGHLY.


1. ARRANGE EACH THIGH ON A BED OF PAPER TOWELS, 2. LOOSEN UP ANY SUPER FATTY POCKETS AND EXCESS SKIN, 3. TRIM THEM WITH KITCHEN SHEARS, 4. DISCARDED FAT AND SKIN WE DON’T NEED, IT’LL MAKE THE DISH WAY TOO OIL.

CHOP YOUR PORTOBELLOS INTO BITE SIZED PIECES.
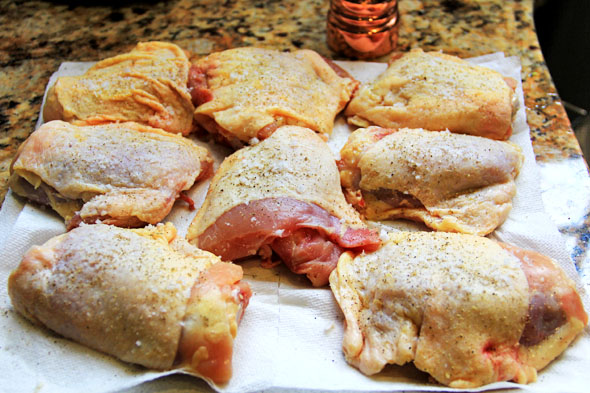
SEASON THE SKIN SIDE WITH A LITTLE COARSE SEA SALT, AND FRESHLY GROUND BLACK PEPPER. HEAT 2 TEASPOONS OF OIL IN A SKILLET OVER MEDIUM-HIGH HEAT.

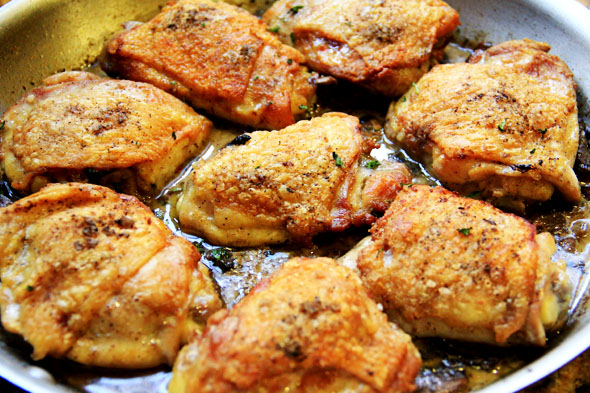
1. CAREFULLY ARRANGE EACH CHICKEN THIGH, SKIN-SIDE DOWN INTO YOUR SUPER HOT SKILLET. THE OIL SHOULD BE LIGHTLY SMOKING AT THIS POINT. IF IT ISN’T SMOKING, IT ISN’T HOT ENOUGH. WAIT UNTIL YOU SEE WHISPS OF SMOKE BEFORE DOING THIS. 2, ONCE THE CHICKEN IS IN THE SKILLET, SEASON THE OTHER SIDE WITH A LITTLE COARSE SEA SALT AND BLACK PEPPER, 3. AFTER ABOUT 7 OR 8 MINUTES, THE CHICKEN IS PERFECTLY SEARED AND RELEASES EASILY FROM THE PAN, 4. FLIP THE CHICKEN OVER AND COOK FOR 2 MINUTES.
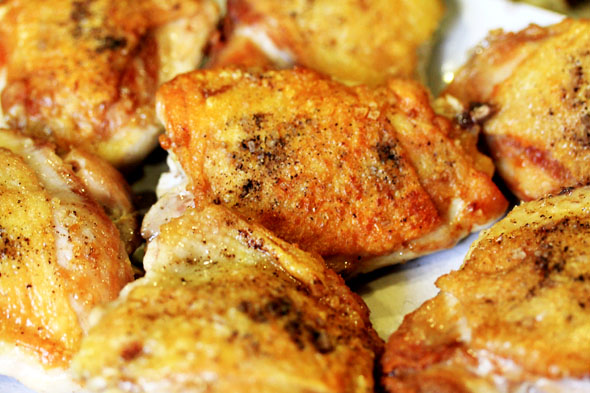
REMOVE THE CHICKEN FROM THE SKILLET, PLACE ON A PLATE AND SET ASIDE. WE WILL CONTINUE COOKING IT LATER.
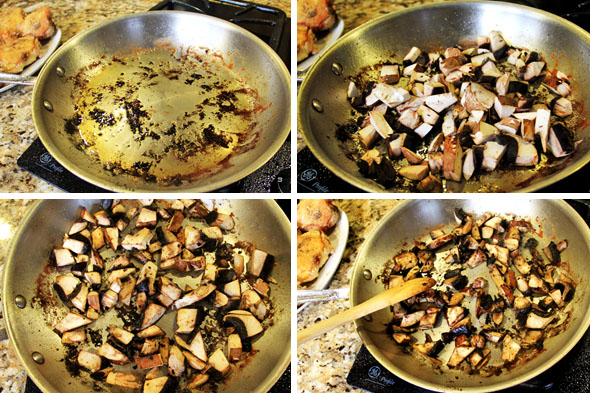
MEANWHILE, REDUCE THE HEAT TO MEDIUM, AND ADD THE MUSHROOMS. DO NOT ADD ANY MORE OIL/FAT TO THE PAN. LET THE MUSHROOMS DRY-ROAST AND DEVELOP A GOOD COLOR ON THEIR OWN. THEY WILL SOAK UP ANY BROWNED BITS ON THE BOTTOM OF THE PAN. DO NOT ADD SALT TO THE MUSHROOMS, WE DON’T WANT THEM TO RELEASE ANY LIQUID AND BECOME MUSHY. AFTER ABOUT 4 OR 5 MINUTES, THE MUSHROOMS SHOULD HAVE A NICE COLOR TO THEM.
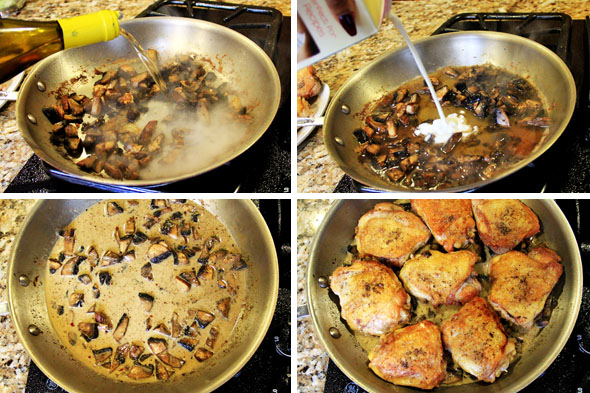
OFF HEAT, ADD THE WHITE WINE. USING A WOODEN SPOON, STIR ANY BROWNED BITS STUCK ON THE BOTTOM INTO THE WINE AND MUSHROOM MIXTURE. THIS IS FLAVOR! ADD A SPLASH OF HEAVY CREAM OR HALF AND HALF. SEASON THE SAUCE WITH SALT, PEPPER, AND DRIED THYME. ONCE IT TASTES GOOD TO YOU (REMEMBER THE ALCOHOL FLAVOR HASN’T COOKED OFF AT THIS POINT), PLACE THE CHICKEN BACK INTO THE SKILLET.
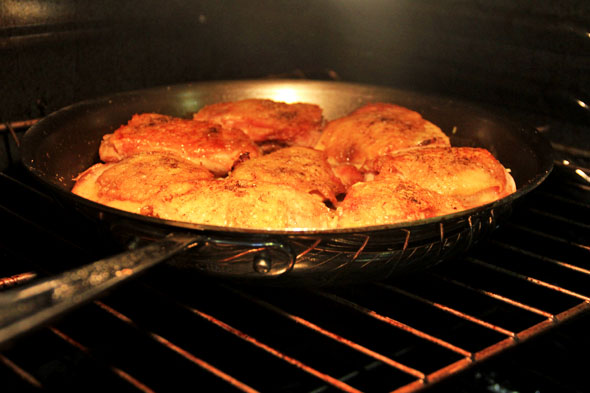
PLACE THE SKILLET IN A 425 DEGREE OVEN FOR 10-15 MINUTES, OR UNTIL CHICKEN JUICES RUN CLEAR.
ALMOST DONE!
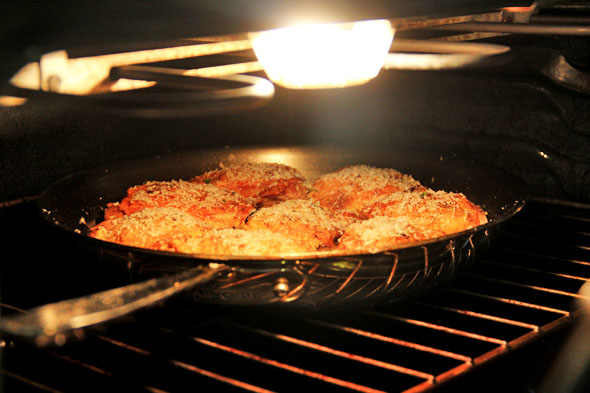
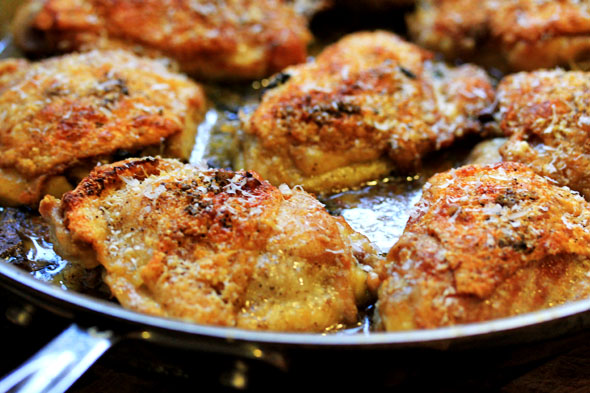
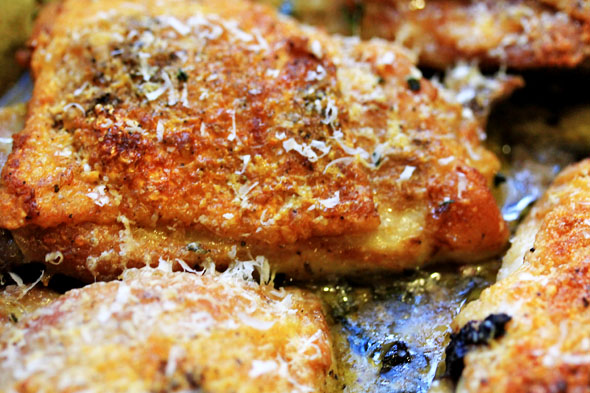
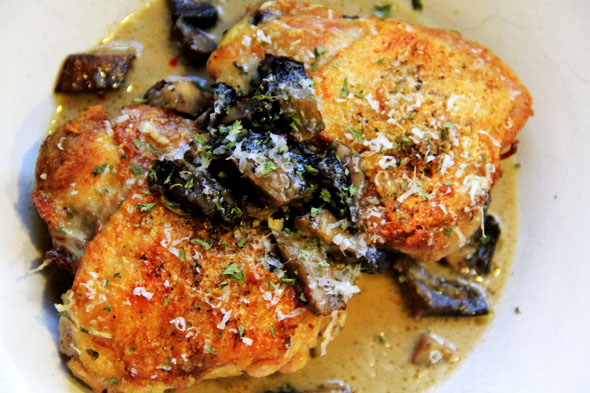
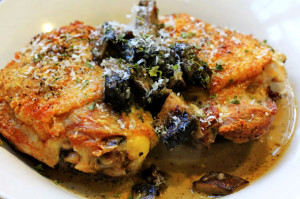
FINALLY, ADD A GENEROUS LAYER OF FRESHLY GRATED PARMIGIANO-REGGIANO CHEESE TO THE CRISPY CHICKEN SKIN, AND PLACE UNDER YOUR OVEN’S BROILER FOR ABOUT 3-5MIN UNTIL THE CHEESE BECOMES GOLDEN BROWN AND DELICIOUS.
AND WE’RE DONE!
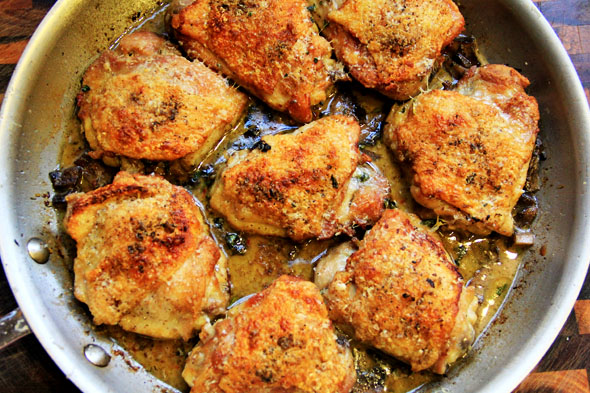
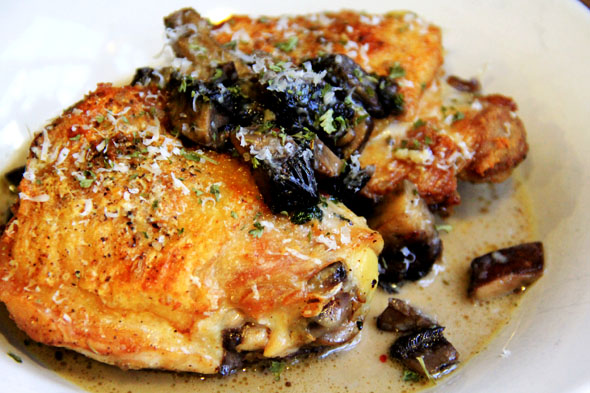
SO GOOD! REMOVE THE CHICKEN FROM THE SKILLET TO A CLEAN PLATE, AND USING A WIRE WHISK, MIX THE SAUCE UNTIL IT COMBINES, JUST IN CASE IT SEPARATED. ADJUST SEASONING, AND IT’S READY TO EAT.
MMMMM
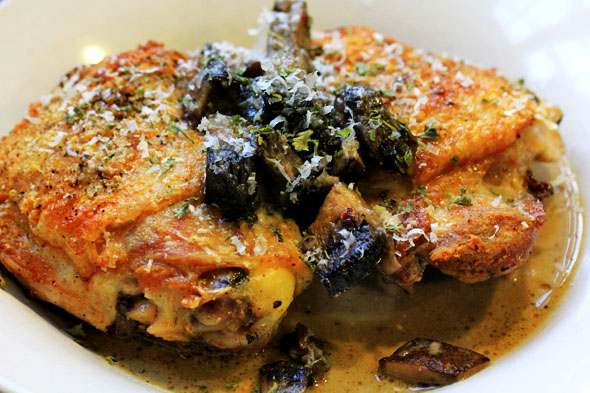
SERVE IT UP, BIG DADDY!
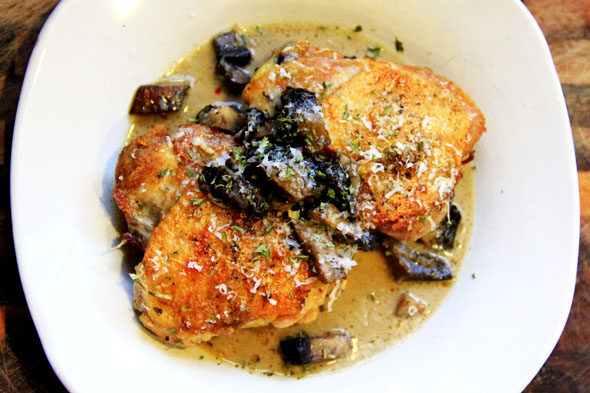
THIS DISH SMELLS AMAZING, TASTES AMAZING, AND IS SUPER EASY FOR A WEEKNIGHT MEAL.
*DROOL*
ENJOY!
I wish my blog had smell-o-vision or something, because this sauce is just…ohhhh..*touches myself*
PARMESAN-CRUSTED CHICKEN THIGHS WITH WHITE WINE PORTOBELLO CREAM SAUCE
PREP TIME
COOK TIME
TOTAL TIME
Serves: 4
INGREDIENTS
- 6oz. organic portobello mushrooms, chopped into bite-sized pieces
- 8 chicken thighs, trimmed of excess fat and skin
- 2 tsp extra virgin olive, grapeseed, or coconut oil
- 1 cup Chardonnay (*see note*)
- 2 to 3 tablespoons heavy cream or half and half
- ¼ cup parmigiano-reggiano cheese, finely grated
- 2 cloves garlic, minced
- ½ tsp granulated onion
- ½ tsp dried thyme
- ¼ tsp dried oregano
- ½ tsp dried parsley
- pinch of crushed red pepper
- coarse sea salt and freshly ground black pepper to taste
INSTRUCTIONS
- Preheat your oven to 425 degrees.
- Thoroughly wash and rinse chicken thighs under cold water in a colander, and let drain.
- Arrange each piece on a bed of paper towels, skin-side down to absorb moisture. Remove excess chicken skin and fat pockets with kitchen shears and discard. Flip the chicken over, skin-side up and blot with a paper towel to remove any excess moisture. Season the skin side with a small pinch of coarse sea salt and black pepper for each thigh.
- Meanwhile, heat 2 teaspoons of oil in a large oven-safe skillet over medium-high heat until just smoking. Once the oil is hot and lightly smoking, add the chicken, skin-side down into the pan. Season the meat-side with a little coarse sea salt and black pepper. Leave it alone for about 6-8 minutes, or until chicken releases easily from pan.
- Meanwhile, chop mushrooms into bite-sized pieces and set aside. Once chicken skin is nice and golden brown, flip each piece over and cook for just 2 minutes. Remove chicken from pan and transfer to a plate and set aside. Reduce heat to medium. Add mushrooms to the hot pan -- do not add any more oil/fat to the pan, and do not season the mushrooms with salt. Don't stir them around too much because we want to develop a nice golden brown color, about 4 to 5 minutes or so.
- Turn off the heat and add the white wine and a splash of cream. Stir to combine. Add garlic, granulated onion, dried thyme, dried parsley, dried oregano, crushed red pepper, and season with coarse sea salt and black pepper to taste. Once it's to your liking (you will taste the alcohol at this point as it hasn't cooked off yet.), place the chicken back into the pan.
- Place the skillet inside of the 425 degree oven on the middle rack, and cook until chicken juices run clear, about 10 -12 minutes. If using a meat thermometer, the thighs should register between 165-175 degrees. Remove skillet from oven using oven mitts.
- Turn on the broiler to your oven. Sprinkle an even layer of Parmesan cheese over each thigh. Place the skillet back into the oven under the broiler for 3 to 4 minutes or until cheese completely melts and becomes golden brown and nutty. Remove from oven and turn off the heat. Place each thigh on a clean plate, and whisk the sauce to combine -- just in case it separated, and adjust seasoning if necessary. Serve each thigh with a generous ladle of the white wine mushroom sauce and enjoy.
NOTES
You may need a little more than 1 cup of wine if you have a large pan. Please adjust as needed.
Comments
Post a Comment